Showing posts with label cards. Show all posts

Sunday, August 2, 2009

3 x 3 box w/cards

I've been wanting to make this box with its accompanying cards for ages. I finally sat down last night and did it. I used the same paper and stamp set as the Splitcoasters tutorial. I really wanted to see how I was doing compared to the tutorial. Now I can go through my designer paper and choose something else. These were time consuming, but worth the effort. What did I do before I had an nestabilities? I can't wait to get more shapes. They cut down on time and add so much with just a little bit of effort.


After I took these pictures I realized that the adhesive isn't sticking as well as I would like. I re-stuck the ribbon on the one Kiwi Kiss card, but I just noticed the box and my computer isn't in my craft room.

I've been using a lot of retired colors lately, because I'm finally making cards and scrapbook pages and 3-d projects. It has been very nice to actually be able to see everything I have and can actually find things. When I was labeling all my stamp sets, I found that a ton of them are retired. I'm thinking of going through them and seeing what I really want to keep and what I'll be selling off. I have a few that I purchased off of e-Bay that I wonder "why did I buy that?" Those will definitely be the first to go.

Click here to place an order


stamp set: Dreams du Jour and Sprinkles
ink: Riding Hood Red, Kiwi Kiss, and Pink Pirouette (all retired '08-'09 In Colors)
paper: Raspberry Tart DP (ret.), Riding Hood Red, Kiwi Kiss, and Pink Pirouette CS (all retired '08-'09 In Colors), and unknown white CS
accessories: markers: Old Olive, Regal Rose, and Rose Red, Pretty in Pink 1/4" grosgrain ribbon, American Crafts Elements 1/2" white grosgrain ribbon, Nestabilities, dimensionals, SNAIL adhesive, Button Bouquet (Kiwi Kiss and Riding Hood Red ret.)

Thursday, July 30, 2009

Inspired by Carter's closet

After Libby so nicely took my advice and added Carter to her card inspiration challenge, I couldn't not participate. I don't have a dinosaur stamp, so I used my dragon from a long retired set Dreams & Dragons. I rapturously wrote about it here. I tried really hard to get rid of his wings and breath, but they didn't want to disappear totally. I didn't really have any circles either. Carter is sitting in a huge turquoise tunnel with circles cut out. So, I used bubbles instead. My layout is based on Splitcoasters card challenge SC239. I'm not sure if it still counts since I added another layer with the circle and the sentiment. I have no idea what I will do with this card. I'll put it in the box for an occasion in the future.

I just purchased my first set of nestabilities (all the circles), so I had to use at least one. I'm excited; it seems that everyone has at least one set of nestabilities and uses them frequently. I'm loving both them and my big shot dies. Once I had an idea of colors and layout, this card went quite quickly. Can I use another "q" word? :)


An update on Stellan can be found here. He is doing better, but still needs tons of prayers. He is headed to Boston any day now, as soon as there is a bed for him. Now that the medicines have kicked-in, he feels better. However, the high dosage of heart medication makes him really sick, so the doctors have added anti-nausea medicine as well. How his family manages I have no idea. Some people can take everything thrown at them and continue with life; others can barely handle just getting up every day.

stamp set: Dreams & Dragons (ret.) and Short & Sweet
ink: Taken with Teal, Basic Black
paper: unknown white CS, Tempting Turquoise, Taken with Teal, and Real Red CS
accessories: Pacific Point corduroy buttons (ret.), word window punch, Cuddlebug, bubbles cuddlebug texture, nestabilities, dimensionals, SNAIL adhesive


Wednesday, July 29, 2009

This is what I've been working on

These are the scrapbook pages I've done for Deirdre's book. They seem to take forever. I can't just put pictures on a page. All the cardstock, ink, and accessories have to match the dominating colors of the pictures. I managed in three different days to make three different double page spreads.


These are actually in reverse order of how I made them. I really like the zoo one the best. There is another dps to go with full of dolphins, but the pictures need some editing in Photoshop first. On the screen they look fine, but once they are printed the dolphins are just dark blurs.

I also needed another of the gift card holders. I goofed when working on the base layer. I thought I was using the score blade, but instead was using a regular blade. So, I turned that one into an example that I put all the sizes into for future reference. Then I made a new one. These are so fun and easy to make. Thank you to Angie Juda for the tutorial on these.

stamp set: God's Beauty (ret. Hostess Level 1 S/S '09)
ink: Not Quite Navy
paper: Not Quite Navy, Kraft, and Very Vanilla CS, DP Bella Bleu
accessories: SNAIL adhesive, dimensionals, and white medium envelope


Sunday, July 26, 2009

latest cards

These are holders for gift cards. I got the idea from Angie (click here for her blog Chic' n Scratch). I didn't have the stamp set she was using nor the designer paper, so I looked through my stash (yes, I already have one) to find some DP that I liked for these. One is for my niece and the other for her husband.


Supplies used (all are SU! unless otherwise stated):
stamp set: Organic Grace (retired Hostess level 1 from Fall/Winter '08 IBC)
paper: Night of Navy, Brocade Blue, and Garden Green CS, Prestwick DP (ret.)
ink: Basic Grey classic
accessories: SNAIL adhesive, dimensionals, and white medium envelope


Supplies used (all are SU! unless otherwise stated):
stamp set: Eastern Blooms
paper: Kiwi Kiss (ret. '08-'09 In-Color), Pretty in Pink, and Whisper White CS, Raspberry Tart DP (ret.)
ink: Kiwi Kiss (ret. '08-'09 In-Color) classic
accessories: SNAIL adhesive, dimensionals, and white medium envelope


These have two slots inside—one for the gift card and the other for a little note. These were super easy and fast to make. I think it took longer to select the stamp set and DP than it did to make each one.

I told you

I knew there would be several posts today. Here's the next one.

The late-night stampers have a "royal blog tour" happening on their many (80 in all) websites going on for the next few days. There are many really interesting cards, scrapbook pages, and altered items on these pages. I have found several new people to watch as their ideas are quite interesting. If you are interested in following or just looking at a few follow this link to get started.

Monday, July 13, 2009

Card Redoux

Here's the next one I made today. This was a lot of fun to make even if it did take forever and a day. Hopefully, I'll get faster as time goes on. There are some mistakes, but it's hand made so no one should expect perfection. Right? The first image shows the colors better and the second image shows the saw's gold and silver better.


This is the inside before I put any personal comments.

Supplies (all SU! except where noted):
stamp set: Totally Tool and Very Versatile
paper: To the Nines Specialty DP (SU! retired), Sahara Sand textured CS, Very Vanilla and More Mustard CS
ink: Always Artichoke, Basic Black
accessories: Chocolate Chip 5/8" grosgrain ribbon, Curly Label punch, black buttons (retired), needle/thread, mat pack, paper piercing tool, dimensionals, gold and silver metallic pens (MS), Top Note Bigz die, Big Shot, sponge daubers, SNAIL adhesive

Update: To the Nines Specialty DP is not retired. I goofed.

Holiday Mini

I just downloaded the holiday mini from Stampin' up! Can I saw WOW! This mini catty is fantastic. I want almost everything I see in it. The "Sweet treats cups" are an awesome idea. I really can't wait until Sept. 1 for everyone else to see this catty. I think SU! has really outdone themselves this time. Here's a peek at the cover.

First card

Here's my first card without copying any ideas or layouts or colors. I know that in the scrapping world all of those are okay, but it sits hard with me. I love this set "A Kind Word." It was in the old catty and was carried over to the new one. It reminds of an artist from the early 80's, but I have no idea who that was just a memory of sweet round faces on the children. I colored the girl with watercolor crayons. Then I meticulously cut her out and mounted her on dimensionals. I also now know why some people don't like using chip board. It is a pain to cut out after covering in cardstock. I probably could have chosen an easier piece than the curly-que that I did.

After looking at now, I think I should have sponged the edges of the sentiment, but it's too late now. One lucky person will get this card for her birthday. It's pretty much a female card not male.


Supplies used:
stamp set: A Kind Word (SU!)
paper: Very Vanilla, Taken with Teal cardstock (SU!), Apricot Appeal textured cardstock (SU!), white cardstock (unknown)
ink: Stazon black, Certainly Celery (SU!) Taken with Teal (marker SU!)
watercolor crayons: Taken with Teal, Certainly Celery, Blush Blossom, Cameo Coral, Chocolate Chip, Tempting Turquoise, Apricot Appeal (SU!)
Accessories: Whisper White Taffeta ribbon (SU!), word window punch (SU!), chip board (K&Co.), dimensionals, SNAIL adhesive

Sunday, September 28, 2008

Bridging Invitations


This is the invitation I made for the ceremony. I sent the cards through my color printer and then did the fronts. I used a musical wheel that I bought off of e-bay. The wheel is stamped in Brocade Blue, while the words and star is in Night of Navy. I used Apricot Appeal for the other stars and the ribbon. I used the new SU scallop edge punch for the front right edge. I didn't really know what I wanted to do with the invitations, so I just "winged" it. I thought they turned out rather well.

Below are all five of the invitations with Jessie, Samantha, and Deirdre behind them. They wouldn't let me take a picture without them in it.I edged the circles with Night of Navy for the smaller one and Chocolate Chip for the larger one. I used my favorite set for the stars. As you can see from the photo each invite was slightly different. I let the girls pick which one they wanted.

I have to add that the pictures were taken in the 4th ward's Primary room—our new home for scouts. Or it was our new home until the Achievement Days decided they would meet there at the same time! So, we are moving into the Relief Society room across the hall. Makes more sense anyway. All of the girls will be moving into Young Womens at some point this year, except poor Samantha has to wait until August. They won't want to meet in the Primary room after they have moved up to YW.

Wednesday, July 23, 2008

PMS—7/23

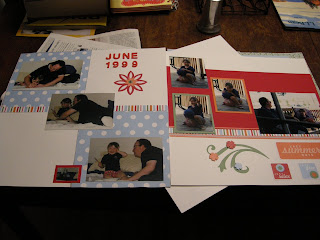
I love that title! Last night I went to a PMS party at Erin's. We scrapbooked for hours. This is what I accomplished.

Several people wanted to know who the little girl in the pictures was. Boy was everyone surprised when I said "Deirdre." Of course the pictures are from nine years ago. I found them in a drawer in the laundry room. A strange place for pictures but they worked for what I was doing. Now only 11 1/2 years of scrapbooking to do.


Today I made this card for my former yearbook rep. She is getting married on Aug. 1 in the Salt Lake Temple. I am so happy for her. I don't have a "wedding set" of stamps, so I used my "Dreams and Dragons" set. I love that set and am so glad I won it on e-bay. The set is from 1996 and was re-issued in 2003 for the 15 anniversary. I could probably get rid of half my sets and just use this one over and over. I am sure Jeff would be thrilled.
front view
inside view (or at least part of it)
I used Pale Plum, Perfect Plum, WW, SU pastels for the dragon (the picture doesn't do it justice, it's a beautiful purple shade; the first picture shows the Pale Plum around the CB white)
I goofed on my sentiment. I hope they don't mind. I knew exactly what to write, but that isn't what I put.